From Roblox Studio to a Public Experience: How to Save, Configure, Test and Launch Your Roblox Game
You need to move your project into the Roblox cloud, establish the creator information, select supported devices, configure the experience, upload branding assets, manage permissions, complete the required content questionnaire, and test the live experience before inviting everyone in.
Highlights: What You Need to Do Before Launch
Before jumping into the detailed instructions, here is the overall publishing process:
- Open your project in Roblox Studio.
- Publish the project to the Roblox cloud.
- Enter the experience name, creator, genre, and supported devices.
- Open Game Settings.
- Add your game icon, thumbnails, and description.
- Configure permissions and visibility.
- Complete the Experience Questionnaire.
- Review the game's age rating.
- Change the experience from Private to Public.
- Check the public product page.
- Test the live production server.
- Monitor analytics and player feedback after launch.
- Continue improving the experience through regular updates.
Each stage matters. Skipping configuration or testing can create problems once real players begin joining.
Phase 1: Prepare Your Roblox Studio Project
Before you make your experience public, the first priority is making sure the project is properly saved to Roblox's cloud ecosystem.
When you work on a game locally inside Roblox Studio, your development work initially exists on your computer. Other players cannot simply access that local project. You first need to publish it to your Roblox account or a Roblox Group that you manage.
Step 1: Save and Publish Your Game to the Roblox Cloud
Start by opening your game project in Roblox Studio.
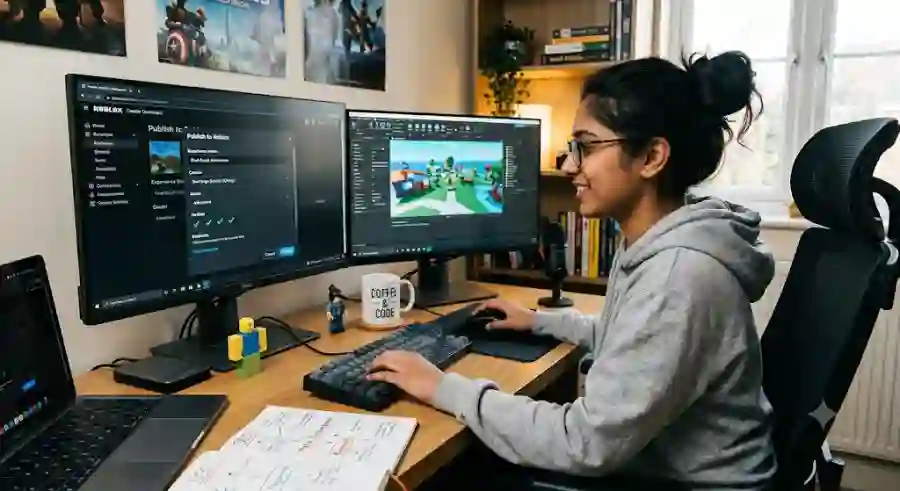
Once the project is loaded, go to the File menu in the upper-left corner of Studio. From the dropdown menu, select Publish to Roblox.
On Windows, you can also use the Alt + P shortcut, while Mac users can use Option + P.
A publishing window will appear and ask you for several important details.
Choose a Memorable Game Name
The Name field is where you enter the title of your experience.
Try to choose a name that is clean, memorable, and easy for players to understand. A strong title can help players recognize your game and can also make your experience easier to identify when you begin promoting it.
Select the Creator
Next, choose who owns the project.
You can publish the experience under your personal Roblox user account or under a Roblox Group that you manage.
This decision matters because the creator ownership affects how the project is managed and who can work on it.
Select the Genre
You will also need to choose the game's primary genre.
Examples include:
- Adventure
- Roleplay
- Simulator
- Building
Selecting an appropriate genre helps communicate what type of experience players can expect and can assist discovery systems in understanding your game.
Select Supported Devices
Finally, choose the devices your experience supports.
Depending on your controls and game design, this can include:
- Computer
- Phone
- Tablet
- Console
Think carefully about compatibility here. A game designed around keyboard and mouse controls may require additional work before it provides a comfortable mobile or console experience.
Once the required information is complete, click Create.
Roblox will then create a dedicated experience ID and register your main place on its cloud servers.
At this point, your project has moved beyond being just a local Studio file.
Phase 2: Configure Your Roblox Game and Place Settings
Publishing the project to Roblox is only the foundation.
Your next job is configuring the experience so players understand what it is, what it looks like, who can access it, and what kind of content it contains.
Roblox Studio's Game Settings section acts as the central control area for many of these options.
Accessing Experience Settings
Inside Roblox Studio, open the Home tab on the top ribbon and select Game Settings.
If the Game Settings option appears grayed out, make sure you have completed the initial publishing process described above.
Once accessible, this area becomes an important part of managing your experience.
Build a Strong First Impression With Your Game Page
A Roblox player may discover your game through search, recommendations, social sharing, or another player. In many cases, the first thing they see is not your gameplay.
They see your icon, thumbnails, title, and description.
That makes your visual presentation extremely important.
Game Icon
You can upload a square 512x512 pixel game icon.
For the strongest presentation, focus on one clear visual idea. A high-contrast character, recognizable logo, or strong focal element can make the icon easier to understand, especially when it is displayed at a smaller size.
Avoid overcrowding the image with tiny text or too many visual elements.
The goal is simple: players should be able to recognize what your game is about quickly.
Thumbnails
Your thumbnails give potential players a larger preview of the experience.
You can add up to 10 high-resolution images or video previews, with 1920x1080 recommended for images.
Use these spaces to show genuine gameplay, interesting environments, memorable characters, unique mechanics, or other features that make the experience worth trying.
A good thumbnail should answer a player's silent question:
“What will I actually get if I click this?”
Why Honest Thumbnails Matter
There is a temptation to make promotional images look more dramatic than the actual game.
That can work against you.
Avoid misleading thumbnails or clickbait graphics that promise something your game does not deliver. Players who feel deceived may quickly downvote the experience, which can damage your game's performance in recommended feeds and discovery systems.
Strong promotion should create curiosity without creating false expectations.
Write a Clear Game Description
Your description should explain the core gameplay loop in simple language.
Tell players what they actually do once they enter the experience.
You can also include:
- Key gameplay features
- Recent update information
- Social links
- Community guidelines, when applicable
A useful description does not need to be complicated. Players should be able to understand the main idea quickly before deciding whether to play.
Managing Roblox Game Permissions and Visibility
One of the most important publishing decisions is determining who can access your experience.
Inside the Permissions section of Game Settings, you control the game's visibility.
Newly published projects are set to Private by default.
Before making your experience public, understand what each access level means.
Private
With Private access, only you and group developers with the appropriate editing rights can join.
This is ideal during early development when you are still building features, fixing bugs, and testing systems.
Friends
The Friends setting allows users on your Roblox friends list to access the experience.
This can be useful for closed beta testing when you want real players to try the game without opening it to everyone.
Public
A Public experience can be searched for, discovered, and played by Roblox users.
This is the setting you need when you are ready for a full launch.
Before switching to Public, however, there is another important step involving content maturity and age guidelines.
Phase 3: Complete the Experience Questionnaire
Roblox requires experience creators to complete a standardized Experience Questionnaire before launching an experience publicly.
This questionnaire helps determine the appropriate content age group for the experience.
The available age categories described in the publishing process are:
- All Ages
- 9+
- 13+
- 17+
The questionnaire is a self-assessment, so accuracy matters.
Step 2: Complete the Age Guidelines Questionnaire
To complete the questionnaire:
1. Open the Roblox Creator Dashboard
Visit the Roblox Creator Dashboard in your web browser at create.roblox.com.
2. Select Your Project
Open the Creations section and select the experience you want to configure.
3. Open the Experience Questionnaire
Use the left-side navigation and go to:
Audience > Experience Questionnaire
4. Answer the Questions Honestly
The survey asks about different types of content that may appear in your game.
Examples include:
- Violent combat
- Blood presentation
- Crude humor
- Paid random items
Answer the questions honestly based on the actual content in your experience.
Trying to understate mature elements can create problems later, so treat the questionnaire as an important part of responsible game publishing.
5. Submit the Questionnaire
After completing the survey, submit it.
Your place will then automatically receive its official age-rating badge.
This rating gives players useful information about the type of content they can expect before entering the experience.
Phase 4: Launch, Test, and Verify Your Roblox Game
Once the build is published, the branding is ready, permissions are configured, and the age guidelines are complete, you are approaching launch day.
But do not rush straight into public access.
There are several checks worth completing first.
Switch Public Access On
From the Creator Dashboard or Roblox Studio's Game Settings, change the visibility from Private to Public.
Save the changes.
Your experience is now available for Roblox users to discover and play.
However, publishing should not be treated as the end of testing.
It is the beginning of the live phase.
Verify the Public Product Page
Open your game page through the main Roblox website or mobile app.
Ideally, check the page using a non-developer account or an incognito browser.
This gives you a better idea of what an ordinary player sees.
Look carefully at:
- Game icon
- Thumbnails
- Description
- Visibility
- Overall page presentation
- Loading behavior
Sometimes a creator becomes so familiar with the development environment that small presentation problems go unnoticed. Viewing the experience as an ordinary player can reveal issues you may otherwise miss.
Test the Live Production Server
Studio's playtest mode is extremely useful during development, but it is not exactly the same as joining your published experience.
For a final check, join your live server directly through the Roblox client.
This helps verify important production systems, including:
- Scripts
- Data stores
- Save systems
- Badges
- Real server behavior
This final live test is especially important for games where player progress, rewards, inventories, or other persistent systems matter.
A game that works perfectly in Studio can still behave differently when real players connect to the production environment.
Essential Post-Launch Checklist
Publishing the game is only the beginning.
The real challenge is convincing players to stay, return, and recommend your experience to others.
Once your Roblox game goes live, shift your attention from simply building features to understanding player behavior.
1. Monitor Your Analytics
Use the built-in analytics tools available through the Creator Dashboard.
Pay particular attention to important performance signals such as:
- Day 1 (D1) retention
- Average session length
- Crash reports
Retention is especially valuable.
If players regularly leave during their first two minutes, the problem may not be the entire game. The issue could be the tutorial, introduction, spawn area, confusing controls, slow opening sequence, or lack of immediate direction.
The first few minutes deserve serious attention because they establish the player's first impression of the experience.
2. Listen to Your Community
Player feedback can reveal problems that analytics alone cannot explain.
Consider establishing an off-platform community hub or feedback system where players can share their experiences.
Direct feedback can help you identify:
- Game-breaking bugs
- Balance problems
- Confusing mechanics
- Unpopular features
- Missing quality-of-life improvements
Fixing these issues quickly can help protect your game's thumbs-up rating percentage and improve the overall player experience.
Not every suggestion needs to become a feature. The important thing is recognizing recurring problems and understanding why players are reporting them.
Keep Your Roblox Game Fresh With Regular Updates
A successful Roblox experience rarely remains completely unchanged.
Players enjoy discovering something new, and regular updates can help maintain interest in your game.
Consider releasing updates on a weekly or bi-weekly schedule when your development resources allow it.
Updates could introduce:
- New levels
- New items
- Cosmetic rewards
- Special reward events
- Gameplay improvements
Fresh content gives existing players a reason to return and can help keep an experience active in discovery channels.
That does not mean every update needs to be massive.
A small but meaningful improvement can sometimes be more valuable than a large update that introduces unfinished or poorly tested features.
Consistency matters.
Industry Impact: Why Roblox Publishing Is More Than a Technical Step
Roblox has developed into much more than a place where users casually play games.
For creators, it functions as a large interactive ecosystem where developers can experiment with gameplay concepts, build communities, test ideas, and develop recognizable experiences.
That makes the publishing process important from both a technical and creative perspective.
A polished game with strong mechanics can struggle if its product page looks unfinished. Likewise, attractive thumbnails cannot save an experience that crashes, loses player progress, or provides a confusing first few minutes.
The strongest Roblox projects bring these areas together:
Good gameplay + reliable technology + strong presentation + continuous improvement.
That combination gives players a reason to click, stay, and eventually return.
Why Publishing Correctly Matters for New Creators
For a first-time developer, the publishing process can feel complicated because several Roblox tools are involved.
Roblox Studio handles the core development environment, while the Creator Dashboard provides important management and audience-related tools.
Understanding how these pieces connect makes the entire workflow much easier.
The process essentially moves through four major stages:
Build → Publish → Configure → Launch and Improve
First, you create the experience.
Then you save it to Roblox's cloud.
After that, you configure its identity, permissions, supported devices, visual assets, and content information.
Finally, you launch it publicly, test the live version, monitor player behavior, and continue improving it.
That final stage is where many creators discover the difference between simply publishing a game and building a sustainable Roblox experience.