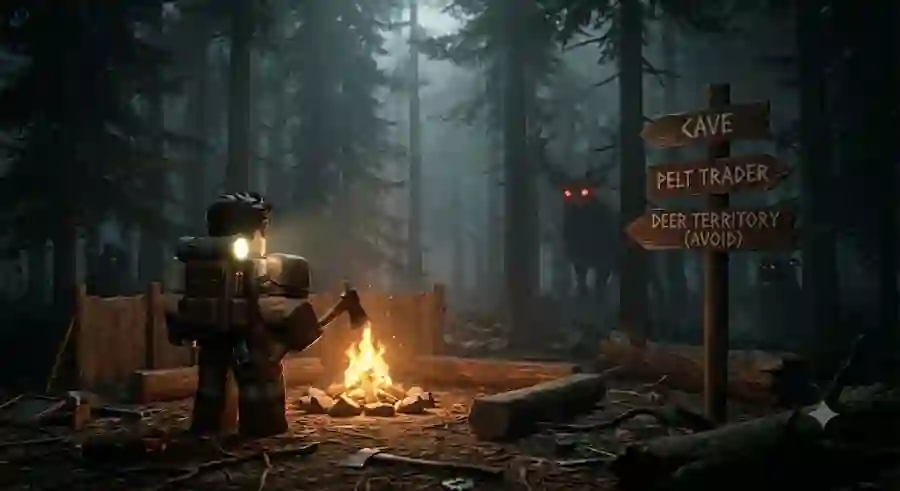
Master the first four days, farm resources faster, defeat night monsters, rescue all four children, and build the perfect setup for a Day 99 victory.
Your objective can be as simple as reaching the 100-day milestone, but players who want to progress faster can also focus on rescuing the four missing children scattered throughout the forest. Each rescue provides a major time-acceleration bonus, making the overall journey considerably faster.
Highlights
Here are the most important strategies to remember if you want a reliable Day 99 run:
- Use the first night to explore instead of immediately returning to camp.
- Create a tight tree farm beside your base.
- Prioritize the Good Sack when trading with the Pelt Trader.
- Save the next Wolf Pelt for the Good Axe.
- Use chairs from abandoned buildings to carry wood more efficiently.
- Master rapid weapon swapping between firearms.
- Upgrade the Crafting Bench to Level 4 as quickly as possible.
- Build the Ammo Crate to solve long-term ammunition problems.
- Use the Crock Pot to make Stews for efficient hunger management.
- Rescue all four missing children to accelerate progression.
- Choose a class that matches your preferred playstyle.
These decisions might seem small individually, but together they can completely change the pace of a survival run.
The Day 1 to 4 Blueprint
The opening four days are arguably the most important part of a successful run. A strong beginning gives you resources, equipment, and a reliable base before the forest becomes significantly more dangerous.
Instead of wasting your first few days standing around the campfire, use every daylight window efficiently.
Day 1: Start the Initial Resource Loop
The moment you spawn, begin chopping nearby trees.
Collect all available logs and saplings, but do not immediately spend everything on fueling the campfire. Your first priority should be building up a useful resource supply.
There is also an important Night 1 opportunity that inexperienced players often miss.
Do not rush back to camp.
The Deer monster, which becomes one of the most dangerous threats later in the game, is largely inactive during the first night. That gives you an unusually safe opportunity to explore nearby areas.
Search surrounding buildings for early loot. You may find useful equipment such as revolvers or basic melee weapons, giving you an early combat advantage without having to spend valuable resources crafting everything yourself.
Hunger can also become a problem while you are away from camp. If your hunger bar starts getting low, do not panic. Eating raw berries or raw meat can keep you going. The small health penalty is generally less dangerous than allowing starvation to kill you.
The goal of Day 1 is simple: gather as much as possible while taking advantage of the relatively forgiving first night.
Day 2: Build Your Tree Farm
Once you return to your base, put those collected saplings to work.
Plant them together in a tight clump directly beside your camp.
This setup is extremely useful because, once the trees grow, you can chop down approximately five to six trees at the same time. Instead of constantly traveling across the map looking for wood, you create a localized and effectively infinite wood source close to your base.
That saves time and reduces unnecessary exposure to dangerous areas.
Day 2 also introduces the Pelt Trader, one of the most important NPCs for long-term progression.
Begin hunting rabbits around your camp and work toward obtaining a Bunny Foot.
Do not underestimate this first trade. Your choice here influences how efficiently you can loot and gather resources during the next stages of the game.
Day 3: Upgrade the Campfire and Crafting Bench
Day 3 is about turning your growing resource stockpile into actual progression.
Take your collected wood and invest it into the campfire. Your target should be reaching Level 2 or Level 3.
A higher-level campfire does more than simply provide warmth. It expands your safe illuminated perimeter, giving you a larger protected area around your base and making wider exploration possible.
At the same time, start processing the scrap you have collected at your crafting bench.
The goal is to unlock better tools and begin moving away from the weakest early-game equipment.
A strong campfire combined with improved tools creates the foundation for the more dangerous nights ahead.
Day 4: Prepare for the First Serious Threats
By Day 4, the forest starts feeling considerably less forgiving.
Nighttime threats become more aggressive, so this is the point where you should stop thinking only about gathering and start preparing for defense.
Craft basic barriers or bear traps around your base. These can help funnel incoming Cultist attacks into predictable areas, giving you more control over where enemies approach from.
You should also stock up on cooked food and organize your inventory before going on deeper exploration runs.
The objective is to enter the next stage of the game with enough food, equipment, ammunition, and defensive options that an unexpected encounter does not immediately end your run.
Pelt Trader and Backpack Progression
The Pelt Trader is one of the most valuable NPCs in 99 Nights in the Forest.
His trade progression follows a specific order:
Bunny Foot → Wolf Pelt → Alpha Wolf Pelt → Bear Pelt
Understanding this sequence is important because selecting the wrong upgrade early can slow down your entire run.
Always Take the Good Sack First
After handing in your first Bunny Foot, you will receive a choice between tool and inventory improvements.
The best choice is the Good Sack.
Why?
Because additional inventory capacity improves almost every activity you perform.
More space means you can stay away from camp longer and return with more scrap, fuel, ammunition, and other useful resources in a single trip.
That reduces wasted travel time and makes every looting expedition more productive.
After expanding your storage, save your next important trade—the Wolf Pelt—for the Good Axe.
The improved axe makes resource gathering considerably faster, helping you maintain your campfire and continue building your base without spending excessive time chopping trees.
A Simple Backpack Trick: Carry Chairs
Inventory management becomes increasingly important when exploring abandoned buildings.
One useful trick is to look for chairs.
Breaking chairs gives you wood items that stack efficiently. Carrying two chairs in your sack provides the equivalent of 10 raw logs, while using significantly less inventory space.
That makes chairs an excellent option when your inventory is nearly full but you still want to bring valuable wood back to camp.
Small inventory decisions like this can make a surprisingly large difference during long scavenging trips.
Mastering Combat in 99 Nights in the Forest
Combat is one of the areas where reckless players are punished most severely.
Standing still while repeatedly swinging a melee weapon or firing a gun gives hostile mobs enough time to surround you.
Movement is therefore just as important as damage.
You need to keep enemies at a manageable distance, understand their attack patterns, and use your weapons efficiently.
One of the strongest techniques available is rapid weapon swapping.
The Weapon Quick-Swap Trick
Players often refer to rapid weapon swapping as speedloading.
The idea is straightforward: instead of waiting for a firearm's normal fire-rate delay or cooldown animation, quickly switch between two guns.
A powerful example is:
Revolver → Rifle → Revolver
Fire one weapon, instantly switch to the second firearm, fire again, and switch back.
This allows you to unload three high-damage rounds in under a second when performed correctly.
Against dangerous enemies such as Alpha Wolves and Cultist leaders, that burst damage can be enough to eliminate them before they have a chance to close the distance.
This is especially valuable when you are dealing with multiple threats and cannot afford to stand still while waiting for a weapon to become ready again.
Understanding the Forest's Major Threats
Different enemies require different responses. Trying to fight every creature in exactly the same way is a quick route to disaster.
| Threat | Behavior | Counter-Strategy |
|---|---|---|
| The Deer | Invulnerable stalking monster that is mainly active at night. | Briefly stun it with a flashlight or climb high structures such as fire towers and ladders. |
| Cultists | Humanoid enemies that raid bases or guard ruined structures. | Maintain distance, use speedloading, or funnel them through traps. They drop Cultist Gems. |
| Owls | Flying predators that begin appearing during later nights. | Watch the canopy when you hear a screech and flash your light upward to interrupt their dive. |
| Bears & Wolves | Aggressive wildlife that guards important locations. | Circle-strafe while using melee weapons, or focus exclusively on headshots with a Rifle. |
The Deer
The Deer is especially frightening because it cannot simply be killed.
Since it is invulnerable, your goal should be survival rather than attempting to defeat it.
A flashlight can briefly stun it, while climbing elevated structures such as fire towers or ladders can help you escape its reach.
The best response is to stay calm, use the environment, and avoid getting trapped in open ground.
Cultists
Cultists can attack your base or protect important ruined structures.
Keeping distance is essential. Speedloading can quickly eliminate dangerous targets, while barriers and traps can help turn your base into a controlled defensive position.
Defeated Cultists also provide Cultist Gems, making these encounters useful for progression when you are properly equipped.
Owls
Later nights introduce flying predators.
When you hear an Owl's screech, look toward the canopy. Flashing your light upward can interrupt its dive and give you a chance to reposition.
Ignoring the warning sound is dangerous because the attack can come quickly.
Bears and Wolves
Aggressive wildlife often guards key locations, so simply avoiding these enemies is not always an option.
Against them, you can circle-stride while attacking with melee weapons.
If you have a Rifle, another option is to focus exclusively on headshots. Precision becomes especially important when dealing with tougher wildlife.
Base Upgrades: Why the Ammo Crate Should Come First
As your base develops, you will unlock more crafting choices.
You may find yourself deciding between structures and items such as rain catchers, biofuel processors, storage shelves, and crock pots.
While all of these can be useful, players aiming for an easier route toward Day 99 should prioritize one specific progression path.
Rush the Crafting Bench to Level 4
Your main goal should be upgrading the Crafting Bench to Level 4 as quickly as possible.
Once you reach that point, build the Ammo Crate.
This upgrade can fundamentally change your entire run.
The Ammo Crate allows you to craft boxes of ammunition for only three pieces of scrap.
That changes ammunition from a resource you constantly worry about into something you can produce more reliably.
Once ammo becomes easier to maintain, you can safely clear dangerous areas, attack Cultist strongholds, and defend your base during late-game raids without relying heavily on risky close-range melee combat.
For players comfortable with firearms, this is one of the biggest efficiency improvements available.
Use the Crock Pot for Long Exploration Runs
After the Ammo Crate, your next major sustain priority should be the Crock Pot.
Instead of consuming individual cooked meats or raw vegetables, combine uncooked carrots and meat in the Crock Pot to create Stews.
A single Stew restores roughly half of your hunger bar.
That makes Stews extremely useful when you are traveling far away from your base.
Rather than constantly stopping to manage small individual food items, you can carry a few efficient meals and focus on exploration, combat, and looting.
For long-distance resource runs, this simple food upgrade can make the difference between a successful expedition and an emergency trip back to camp.
Rescue the Four Missing Children
Reaching Day 99 is one way to play the game, but players looking to accelerate their progression should actively pursue the four missing children.
Each rescued child provides a massive time-acceleration bonus, reducing the total amount of real-world time needed to complete the game.
However, each rescue presents a different challenge.
Child 1: The Red Key Target
The first child is located relatively close to your camp.
The holding area is protected by red-collared wolves.
A Revolver is a useful option here because you can focus on precise headshots rather than allowing the wolves to close in.
Defeat the guards, retrieve the Red Key, and use it to unlock the child's holding cell.
Because this rescue is relatively close to camp, it is a strong early objective once your basic equipment is ready.
Children 2 and 3: Mid-Game Rescues
The second and third children are located deeper in the world.
Their locations can include areas such as:
- Caves
- Temples
- Ruined cabins
These environments are more dangerous and require better preparation.
A Level 3–4 campfire light radius can make navigation safer, while torches can also help illuminate dark areas.
The key is to avoid entering these locations underprepared. Darkness and night creatures can turn an otherwise manageable rescue into a difficult escape.
Child 4: The Bear Den and Yellow Key
The final rescue is one of the most demanding.
The fourth child is located in the Bear Den and is guarded by two powerful Bears.
Before attempting this rescue, bring:
- At least 30+ Rifle rounds
- Iron armor
- Multiple healing Stews
The safest offensive strategy is to focus on headshots.
You need to eliminate the Bears before they can reach you and overwhelm your defenses.
Once the area is secure, collect the Yellow Key, unlock the holding area, and escort the final child back to safety.
This encounter is not something to rush into with basic gear. Preparation is the difference between a successful rescue and a lost run.
Best Classes to Unlock
Diamonds can provide another major advantage.
If you have spare Diamonds from daily missions or events, choosing the right class can give your run a significant early-game boost.
Three classes stand out for different playstyles.
Scavenger — 40 Diamonds
The Scavenger costs 40 Diamonds and is arguably the best budget option.
Its additional movement speed and base storage bonuses make early scrap gathering much more efficient.
For players who want a smoother start without spending a large number of Diamonds, Scavenger is an excellent choice.
Lumberjack — 70 Diamonds
The Lumberjack costs 70 Diamonds.
This class is particularly useful for team hosts.
It begins with a better axe, allowing you to gather wood much faster and helping your campfire reach Level 3 before Night 2 even begins.
If your group depends on one player to manage the base and maintain the campfire, Lumberjack can be especially valuable.
Ranger — 70 Diamonds
The Ranger also costs 70 Diamonds.
It is the natural choice for players who prefer ranged combat.
The class provides built-in firearm perks and accuracy buffs, making it easier to rely on guns when dealing with wolves, Cultists, Bears, and other threats.
If your preferred strategy revolves around keeping enemies at a distance, Ranger is a strong investment.
Industry and Gameplay Impact: Why Efficient Progression Matters
What makes 99 Nights in the Forest interesting is how closely its systems connect.
A better backpack does not simply give you more storage. It makes every exploration trip more efficient.
A better axe does not simply chop trees faster. It allows you to maintain your campfire and support larger exploration windows.
A higher-level campfire does not simply look better. Its expanded light radius changes how safely you can explore.
The Ammo Crate then connects scrap collection to combat by allowing you to turn a basic resource into ammunition.
Even food follows the same philosophy. The Crock Pot transforms ordinary ingredients into Stews that make extended journeys easier to manage.
This interconnected progression is why the early-game choices matter so much.
A player who understands these relationships can spend less time recovering from mistakes and more time actively progressing.
Why the First Four Days Matter So Much
The biggest mistake new players can make is treating every day equally.
They are not.
The first few days give you an opportunity to establish the systems that will support the rest of your run.
By building a clumped tree farm, improving inventory capacity, upgrading the campfire, strengthening the crafting bench, and preparing defensive tools, you effectively create a foundation for the harder nights.
Once the forest's threats become more aggressive, you want your base and equipment to already be ahead of the danger curve.
That is the central lesson of the game: preparation beats reaction.
Waiting until your food is gone, your ammunition is low, and your camp is under attack is far more difficult than preparing for those situations before they happen.